We have been getting heaps of bandicoots through the garden these days. The wet weather over the last 2 years seems to have increased their numbers quite significantly. Besides the annoyance of the bandicoots digging up seedlings in their quest for worms, they also bring another problem along with them: ticks.
Bandicoots are a natural host for ticks and (as with any host) once the tick has had its feed, it will drop off. This break from the host may be to grow some more or to lay eggs, in the case of a mature female.
Unfortunately one of our Muscovy Ducks, Edgar, came across one of these ticks and it managed to attach itself to Edgar's carbuncles. My daughter noticed that Edgar was not coming in for the nightly feed and lock up in the pens, so my wife investigated. Edgar was hardly able to move and allowed himself to be picked up (unheard of for our ducks). My wife had to use pliers to remove the tick as it had gotten too big for tweezers to get around its body.
We were not sure what to do next, so put a search on the web found that Muscovy Ducks had been recently reported to be affected by ticks (and yes we confirmed that). But what about the recovery rate or method for recovery? There was not all that much information to be found, except to keep that animal calm and comfortable.
So we let Edgar stay in the shade in his cage with the door ajar as the weather was not too hot (low 20 degrees C). The first day he did not do too much apart from lie in the one spot with his head lolling on the ground, but was able to drink some water when provided to him (i.e. water dish to bill). The following day he perked up a bit and was talking water more readily. Up until this time there was a small amount of white foam visible in the corner of each of his eyes, which seemed to annoy him a bit; he was observed shaking his head occasionally to try and clear the foam. After about 3 or 4 days he was eating again and able to move around with the rest of the flock.
Previous to this attack, Edgar had been the alpha male. There is one other male in the flock and they had gotten on quite well, probably because the number of ducks to drakes was quite high. But some Wedge-Tailed Eagles had started taking our ducks so the ratio was dropping.
The other male thought that this would be a great time to overthrow the recovering Edgar. I had to intervene a number of times by covering the eyes of the other male (this causes them to stop what they are doing - also handy when dispatching a duck for dinner). Muscovy Ducks can really fight when the get into it. They can be a bit like a couple of ice hockey players going at it. Their wings pack a punch when they connect with your hand, let me tell you.
After the first day of challenge, Edgar had enough and made himself scarce under some recycled materials. That night he did not want to go into his cage, though the males aren't penned in together. The following day he was stronger and thus was able to hold his own a bit better. Then after a few days of duking it out he was top drake again.
So I learned a number of things from this episode: the first being that Muscovy Ducks (or drakes) can recover from a tick bite. However prompt removal of the tick is important, as is ensuring that the animal is kept in a calm state with constant access to water (that is, you might need to bring water to them periodically). And finally, protect the recovering animal if there are other males when either a duck or drake gets a tick.
Wednesday, 12 October 2011

Sunday, 27 March 2011
More Google Earth Updates - Circa 2010
It seems that I have not been paying attention to how things look on Google Maps. However tonight I noticed that the pond was visible when viewing the property. In fact, two imagery updates had been done in 2010 without me noticing.
The first aerial photograph, taken on the 9th of March 2010, shows the beginnings of the swale orchard on the bottom left-hand corner (the south western part of the property). This had just been marked out with grass clippings along the contours of the land. The citrus orchard north of this had also been recently mulched. My parents were visiting at the time, thus I was able to get a significant amount of work accomplished. In the center of the property, the pond is now clearly visible.

The second aerial photograph, taken on the 21st of June 2010, shows the swales as being more substantial as planting had been well underway. The citrus orchard mulching was also being taken over by grass seedlings and other weeds. This area is a bit of a jungle now. To the west of the citrus orchard is the start of the mango line. This area has poor soil due to the cut for the road. It is also exposed to strong westerly winds. So it should be perfect for growing mangos. I have supplied them with manure and compost as mangos can be gross feeders when young.

The first aerial photograph, taken on the 9th of March 2010, shows the beginnings of the swale orchard on the bottom left-hand corner (the south western part of the property). This had just been marked out with grass clippings along the contours of the land. The citrus orchard north of this had also been recently mulched. My parents were visiting at the time, thus I was able to get a significant amount of work accomplished. In the center of the property, the pond is now clearly visible.

The second aerial photograph, taken on the 21st of June 2010, shows the swales as being more substantial as planting had been well underway. The citrus orchard mulching was also being taken over by grass seedlings and other weeds. This area is a bit of a jungle now. To the west of the citrus orchard is the start of the mango line. This area has poor soil due to the cut for the road. It is also exposed to strong westerly winds. So it should be perfect for growing mangos. I have supplied them with manure and compost as mangos can be gross feeders when young.

Notice the colour of the pond water as compared to the other picture. The natural flow of the water and my sediment trap design at the inflow to the pond, really seems to help reduce the amount of suspended particles which most dams suffer from. As a result aquatic life flourishes in the pond. We have even seen evidence of a platypus with heaps of fresh water clams along the pond edge. We know that they exist across the road in our neighbours pond, so they are probably checking out ours as well.
Thursday, 17 March 2011
Beneficial Pests
I did not always think of curl grubs as a beneficial pest. I had been told that they could kill lawn and other plants with their appetite for roots. However, it was once I started making huge compost heaps that I realised the information I had been provided was not the complete picture. If you make a compost or have a large pile of manure, once things cool down, the earthworms and other soil animals will move in. This includes curl grubs which help create wonderfully rich soil. So now instead of squishing them, or feeding them to the chooks, when discovered I toss them to the most organically rich spot in the garden. Eat, my pretties, eat!
Understanding why insects are attacking a plant is the best approach in being able to create a healthier garden. Are you starving your soil, thus starving your plants? Have you recently fed your plants high levels of soluble nitrogen? With organic matter and compost in the soil, everything becomes more balanced and stabilised. Root knot nematodes will not be a problem. I can grow tomato plants in the same place for over 6 months and get great crops off them to the end ("the end" being when I need the particular garden plot for something else) with no visible nematode damage to the roots. I do not fertilise the plants during this time either. The reason I can achieve this is that I have made the soil, so incredibly healthy it can support plants for long periods of time thanks to the well fed soil life. I know I have root knot nematodes on the property, as when feral tomatoes come up in the rose garden, their roots have shown signs of attack.
A health plant can respond to trimming of its roots, branches, and leaves, as long as it is in proportion to the health, vigor, and size of the plant. So when an insect arborist wants to ply its trade, who am I to say no? As long as no major or lasting damage is done to the plant or its fruit, then I do not mind. A healthy plant will respond to the trimming by putting out more growth. I have some native trees on the property that get every leaf completely eaten away by a beetle. But the trees always regrow the leaves and power along quite healthily, so why would I spray the bugs with some organic control? There is simply no point.
When I first set up my veggie garden, I left all insects be. I wanted to see what would happen. Would predators come along? Would the pests really be a problem, such that I could not harvest enough for my family's needs? I certainly found that caterpillars are a pest that needs to be managed, thus my current use of Dipel (Bacillus thuringiensis). But this is because I have not set up the right system in the veggie garden with permanent perennials and similar beneficial plants for key predator insects. Thus once garden designs have been changed, it is important to see if the current control methods are still warranted.
Ants are often thought of as a general pest. But they are fantastic recyclers of above surface material including meat. I use ants to pick the fats from bones before I bury them around the garden. Ants can breakdown the fats very quickly, whereas it will take a longer time if immediately buried in the soil. Ants are great predators. Green ants, which I certainly do not appreciate getting bitten by, will easily take down any cut worms roaming your garden. While ants can tend and protect scale and other honeydew producing insects, the presence of these insects often indicates another problem which needs to be managed for the long term health of the plant. Ants can also assist with pollination, for instance sugar ants will pollinate passionfruit and pitaya (dragonfruit).
Ants are also fantastic aerators of soil. My pastures are allowed to grow tall before I harvest the grass for compost, mulch, and other garden uses. The ants love this and build mounds of soil, excavating from below the surface and bringing it to the top. This improves water penetration, helps roots grow, and even sequesters carbon.
There is no doubt that there are pests which are truly just that. Queensland Fruit Fly being a prime example of such a pest. For those starting out in gardening, it can be hard to know what is a good bug, versus a bad one. So it is nice to know that there is a free locally focused website on Brisbane insects called http://www.brisbaneinsects.com. This website is an absolute gem allowing a better understanding of local insects. If you want to see a 28-spotted ladybird (plant eater) versus a three-banded ladybird (insect and/or fungi eater), then this is the site for you. The layout is well done, giving general information and pictures at the top, which allows people to drill down to more insect specific information as identification progresses.
So the next time you see a so-called pest having a go at your plant, ask yourself if nature has simply posted a job opening for a Sanitation Engineer.
Understanding why insects are attacking a plant is the best approach in being able to create a healthier garden. Are you starving your soil, thus starving your plants? Have you recently fed your plants high levels of soluble nitrogen? With organic matter and compost in the soil, everything becomes more balanced and stabilised. Root knot nematodes will not be a problem. I can grow tomato plants in the same place for over 6 months and get great crops off them to the end ("the end" being when I need the particular garden plot for something else) with no visible nematode damage to the roots. I do not fertilise the plants during this time either. The reason I can achieve this is that I have made the soil, so incredibly healthy it can support plants for long periods of time thanks to the well fed soil life. I know I have root knot nematodes on the property, as when feral tomatoes come up in the rose garden, their roots have shown signs of attack.
A health plant can respond to trimming of its roots, branches, and leaves, as long as it is in proportion to the health, vigor, and size of the plant. So when an insect arborist wants to ply its trade, who am I to say no? As long as no major or lasting damage is done to the plant or its fruit, then I do not mind. A healthy plant will respond to the trimming by putting out more growth. I have some native trees on the property that get every leaf completely eaten away by a beetle. But the trees always regrow the leaves and power along quite healthily, so why would I spray the bugs with some organic control? There is simply no point.
When I first set up my veggie garden, I left all insects be. I wanted to see what would happen. Would predators come along? Would the pests really be a problem, such that I could not harvest enough for my family's needs? I certainly found that caterpillars are a pest that needs to be managed, thus my current use of Dipel (Bacillus thuringiensis). But this is because I have not set up the right system in the veggie garden with permanent perennials and similar beneficial plants for key predator insects. Thus once garden designs have been changed, it is important to see if the current control methods are still warranted.
Ants are often thought of as a general pest. But they are fantastic recyclers of above surface material including meat. I use ants to pick the fats from bones before I bury them around the garden. Ants can breakdown the fats very quickly, whereas it will take a longer time if immediately buried in the soil. Ants are great predators. Green ants, which I certainly do not appreciate getting bitten by, will easily take down any cut worms roaming your garden. While ants can tend and protect scale and other honeydew producing insects, the presence of these insects often indicates another problem which needs to be managed for the long term health of the plant. Ants can also assist with pollination, for instance sugar ants will pollinate passionfruit and pitaya (dragonfruit).
Ants are also fantastic aerators of soil. My pastures are allowed to grow tall before I harvest the grass for compost, mulch, and other garden uses. The ants love this and build mounds of soil, excavating from below the surface and bringing it to the top. This improves water penetration, helps roots grow, and even sequesters carbon.
There is no doubt that there are pests which are truly just that. Queensland Fruit Fly being a prime example of such a pest. For those starting out in gardening, it can be hard to know what is a good bug, versus a bad one. So it is nice to know that there is a free locally focused website on Brisbane insects called http://www.brisbaneinsects.com. This website is an absolute gem allowing a better understanding of local insects. If you want to see a 28-spotted ladybird (plant eater) versus a three-banded ladybird (insect and/or fungi eater), then this is the site for you. The layout is well done, giving general information and pictures at the top, which allows people to drill down to more insect specific information as identification progresses.
So the next time you see a so-called pest having a go at your plant, ask yourself if nature has simply posted a job opening for a Sanitation Engineer.
Monday, 14 March 2011
Solar Power Generation Update
A little under a year ago we had solar panels installed. So I thought an update on how things have been going was in order.
The power savings have been as expected which is fantastic. Our most recent bill was for around $43 dollars (previously we were paying around $240 per quarter). Our power bills include an ambulance fee (around $26) as well as a typical fixed connection charge. During this period, the weather has been anything but conducive to effective solar power generation. In addition, my parents were staying with us for part of the period (and my mother is not quite as power conscience as I would like her to be). So to come out with only a $43 dollar bill is outstanding.
We have been trying to do certain activities at night time, such as using the dishwasher, laundry, baths and showers. Often the computer was being run during the day, but it is a energy efficient laptop. I recently put a timer on the sewage system, so that it only runs during part of the day. This makes a considerable difference to our base power usage and extends the life of the sewage system aerator.
The other great thing is that two other properties right beside me have also installed solar power (they are larger installs as well). I know that my installation helped convince one of my neighbours to take the plunge, which is a positive influence.
So all in all, I am quite impressed with how we have come out. And in another 2 or so years, this system will have paid for itself. Not too bad!
Sunday, 6 March 2011
Growth of the Swale Based Orchard
About one year ago, the swale orchard started taking development. I had previous started the top SE swale/trench and planted two Small Leaf Jaboticabas and a Lemon Myrtle. I also planted other useful plants such as Pigeon Pea, Rosella, and Egyptian Spinach. Since that time I extended the start of the swale so that all the overflow from the rainwater tanks flow through it.

The next picture shows the lay of the land before development of the future swale orchard.

The future swale locations were mapped out using a spirit level, old wooden ladder, and lots of grass clippings. For some reason I neglected to take any pictures when the contour lines were first set out, but they were a maximum of 4.8 m apart, but often merging much closer as they aligned with the contours. Below are some pictures taken around the beginning of May 2010 after planting had been started.
This picture is taken from the main path through the centre of the orchard looking towards the start of the driveway. In the foreground one can see a Bignay or Red Currant Tree (Antidesma bunius). At the next swale to the left is a Black Sapote. As well in the background, there are a Spanish Cherry or Bakul Tree (Mimusops elengi), Hawaiian Guava, Asenia triloba, and Jakfruit (Blackgold).

This picture is taken from the start of the driveway looking through the orchard towards the north east. There are Jakfruit, Vietnamese Mint, local feral Guava, Loquat, Saba Nut or Malabar Chestnut (Pachira aquatica), and Taro planted out.

This picture is also from the same location, but looking towards the east. The Asenia triloba are in the pink protective plant guards and the Hawaiian Guava is to the right.

While it can be seen that many of the plants raised about the "natural" ground, I since found that with settling this was not nearly enough. So I know put much more effort into raising the level for the planting of each tree.
So how do things look now...
This is now the view from the top of the main path down the centre of the orchard towards to the start of the driveway. Note incredible growth of the Red Currant Tree. (Yes the neighbouring bloodwood tree continues to shed branches during heavy winds.)
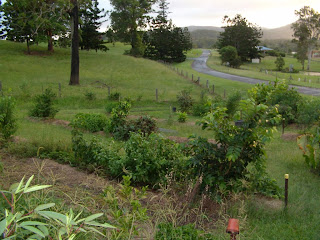
Next is the view from the start of the driveway looking north east. Note the growth of the feral Guava and the Vietnamese Mint on the far left. The Cassava blocks the view of most of the rest of the orchard.

This time we are looking towards the east from the same location. Note the growth of the Hawaiian Guava.

Now for the overall view.

I have found that the effort in making the swales out of compost, using on-the-spot composting techniques, has been extremely successful. The plants are really responding to the nutrient rich soil. For some trees it is a bit much, such as the Custard Apple and Spanish Cherry. These trees suffer from scale attack and the usual associated problems. The Spanish Cherry is particularly vulnerable to scale.
As I have been building up the swales over time, I have had problems during some heavy rain events with low points on the swales being washed downhill (although not off the property). This was particularly the case when a number of uphill swales were only partially completed. This problem has almost been addressed now, with only a few swales not completed and there are no longer multi-swale gaps.
As the plants get settled into their places and the soil life builds up, I have been seeing trees such as the Carambola (Averrhoa carambola) putting on huge amounts of growth. Our unseasonably wet spring and heavy rain periods have been great for the growth of the trees. None have had any problems with root rot.
As for fruits, I have been enjoying some Acerola Cherries. This tree is simply amazing in its output. It has only been in the ground for about 4 months and has been supplying a trickle of fruit for the entire period. But now it is really starting some serious production. Goodbye vitamin C tablets!


The next picture shows the lay of the land before development of the future swale orchard.

The future swale locations were mapped out using a spirit level, old wooden ladder, and lots of grass clippings. For some reason I neglected to take any pictures when the contour lines were first set out, but they were a maximum of 4.8 m apart, but often merging much closer as they aligned with the contours. Below are some pictures taken around the beginning of May 2010 after planting had been started.
This picture is taken from the main path through the centre of the orchard looking towards the start of the driveway. In the foreground one can see a Bignay or Red Currant Tree (Antidesma bunius). At the next swale to the left is a Black Sapote. As well in the background, there are a Spanish Cherry or Bakul Tree (Mimusops elengi), Hawaiian Guava, Asenia triloba, and Jakfruit (Blackgold).

This picture is taken from the start of the driveway looking through the orchard towards the north east. There are Jakfruit, Vietnamese Mint, local feral Guava, Loquat, Saba Nut or Malabar Chestnut (Pachira aquatica), and Taro planted out.

This picture is also from the same location, but looking towards the east. The Asenia triloba are in the pink protective plant guards and the Hawaiian Guava is to the right.

While it can be seen that many of the plants raised about the "natural" ground, I since found that with settling this was not nearly enough. So I know put much more effort into raising the level for the planting of each tree.
So how do things look now...
This is now the view from the top of the main path down the centre of the orchard towards to the start of the driveway. Note incredible growth of the Red Currant Tree. (Yes the neighbouring bloodwood tree continues to shed branches during heavy winds.)

Next is the view from the start of the driveway looking north east. Note the growth of the feral Guava and the Vietnamese Mint on the far left. The Cassava blocks the view of most of the rest of the orchard.

This time we are looking towards the east from the same location. Note the growth of the Hawaiian Guava.

Now for the overall view.

I have found that the effort in making the swales out of compost, using on-the-spot composting techniques, has been extremely successful. The plants are really responding to the nutrient rich soil. For some trees it is a bit much, such as the Custard Apple and Spanish Cherry. These trees suffer from scale attack and the usual associated problems. The Spanish Cherry is particularly vulnerable to scale.
As I have been building up the swales over time, I have had problems during some heavy rain events with low points on the swales being washed downhill (although not off the property). This was particularly the case when a number of uphill swales were only partially completed. This problem has almost been addressed now, with only a few swales not completed and there are no longer multi-swale gaps.
As the plants get settled into their places and the soil life builds up, I have been seeing trees such as the Carambola (Averrhoa carambola) putting on huge amounts of growth. Our unseasonably wet spring and heavy rain periods have been great for the growth of the trees. None have had any problems with root rot.
As for fruits, I have been enjoying some Acerola Cherries. This tree is simply amazing in its output. It has only been in the ground for about 4 months and has been supplying a trickle of fruit for the entire period. But now it is really starting some serious production. Goodbye vitamin C tablets!

Monday, 31 May 2010
Solar Power
 I figured that this is a post worthy of stopping a drought (at least relating to MG posts). Solar power was installed this month and the system has been doing its thing, and that means it is generating power for us.
The solar panels are not very visible (at least when I tried to get them in a picture). Driving up to the shed and walking around, you would have no idea that they are installed. However moving to the north of the shed, soon reveals their presence. A number of neighbours have commented on the panels, with one in indicating that they too want to go down this route. Nothing like flying the flag. :)
We went with Local Power for the installation. They are a Brisbane based solar power buying group. I chose them as they are price competitive and I knew I could trust their choice of solar panels and the associated inverter.

I had a 1.5 kW system installed and upgraded from the inverter to a Xantrex 2.8. This will allow me to add up to another 1.5 kW of panels in the future with no additional wiring required (other than hooking the panels in). On installation day, the Local Power mob turned up with a small army and installed the system in about 2 hours, despite the rainy weather.
The system was operational at the beginning of May which turned out to be quite fortunate as the REC price I received was $42. It has since fallen. If you are curious about the current retail REC pricing reference http://www.greenenergytrading.com.au/rec-prices.html. There is also wholesale information available (http://www.greenmarkets.com.au/index.html) which provides a graph with the historical REC price.
 I did not change electricity retailers as AGL currently provides the best feed-in rate for Queensland. If you want to find out about the best feed-in tariff for your state, reference the Australian Feed-in Tariffs wiki.
The new Energex electricity meter was installed a couple of weeks after the solar panels went in. It is completely digital and allows different tariffs to be recorded using the one meter. At the time of this post, the amount of energy put into the grid was 33 kWh and the amount used was 109 kWh . Ideally I want to get a 1 to 3 ratio or better, so things are going fairly well. Given that we use power to pump water and treat sewage and our hot water system is electric, we are using very little power relative to our basic needs. We plan to install solar hot water in the near future, so this should assure that we hit the 1 to 3 ratio.
Thursday, 24 December 2009
Tracking weather

The Australian Bureau of Meteorology (BoM) has a fantastic web page which shows output from the Mt. Stapylton Radar site. This includes information about current rain and even wind. If there is rain forecast and I need to do an outside activity which is best not done in the rain, then I will visit the following web page:
http://www.bom.gov.au/products/IDR664.loop.shtml?looping=1&reloaded=0&topography=true&locations=true&range=true&waterways=true&roads=true&rail=true
The above link is for the 64km range from the radar site and has a number of map features enabled. The 64 km range from the Mt. Stapylton Radar site gives me greater detail than the 128 or 256 km web pages. The enabled map features allows me to better see where the property is located and also allows me to see the impacts of things like the D'Aguilar Range on rain.
There is also a link for the Doppler wind data. I have not used this link much as I only recently realised it existed. However the next time we get a strong westerly I will make a point of having a look. This link is for a 128 km range from the radar site (I am not sure how I can change the range) with the same map features enabled:
http://www.bom.gov.au/products/IDR66I.loop.shtml?looping=1&reloaded=0&topography=true&locations=true&range=true&waterways=true&roads=true&rail=true
Hopefully this information will be of value to those living in the SEQ region. For those living in other areas of Australia, you will find that the additional map feature information in the link address (i.e. ?looping=1&reloaded=0&topography=true&locations=true&range=true&waterways=true&roads=true&rail=true) will work for other radar stations. You can disable map features by changing the true to false, or removing the "&
Monday, 21 December 2009
First taste of home grown bananas

Interestingly the first banana to become ripe was one in the middle of the bunch. Normally they ripen from the top of the bunch down to the bottom. Blue Java bananas are small and plump, similar in size to Lady Finger bananas. Nicely snack sized for small children.
 This is the first time I have ever tasted a Blue Java banana. It is described as the ice cream banana as it is supposed to have a slight vanilla taste. However I was not able to discern that flavour. I found it to be a very pleasant sweet and creamy banana, although the centre of the banana was a bit hard. This is where seeds would have been produced prior to bananas becoming sterile. The hardness in the centre might have been due to the bunch having to be cut from the plant sooner than it should have. I had planned to allow the bananas to ripen on the plant, before the plant fell over.
I will try various recipes with this banana, assuming that my daughter Felicity allows me to have any more (she loves bananas). Banana smoothies with cinnamon, banana sorbet, frozen banana covered in desiccated coconut, and various baked banana recipes are in store. We'll see how the Blue Java banana holds up to the relentless tasting.
Meanwhile there are four other banana bunches coming on; another Blue Java bunch and three Lady Finger bunches. Two of the plants have been propped up. The other two seem to be holding their own for now. Hopefully this is the start of self-sufficiency in bananas or, at the very least, seasonal self-sufficiency.
Tuesday, 1 December 2009
Google Earth/Maps Imagery Update
 After about 3 years of no updates, including requests by government, Google has finally updated the imagery in the great Brisbane for Google Earth and Google Maps. So now instead of seeing shipping containers where our veggie garden is, you actually see the veggie garden.
The big white shed can still be clearly seen to south of the property. At the south eastern side of the shed, the new off-white rainwater tank is now visible. The veggie garden, banana pit, and possible makings of the chook house are also visible to the east of the shed.
To the north west of the shed, the citrus grove can just been seen bordered by other trees to the south and north. One can also see that some of the grass to the west is a bit brown. This is because it has been allowed to go wild. Although the grass in the north eastern paddock was cut by a neighbour.
The pond is not present in this photo, nor is the swale. I also think that the chook house was not completed at this stage. So I figure that the picture was taken around the mid June to July timeframe (EDIT: as it turns out it was taken on 2009-07-27).
Hopefully we will not have to wait another few years until we can see an aerial view of the pond.
Thursday, 12 November 2009
Raspberry delight

There are two things which really excites Felicity while out in the garden, either saying let's check for strawberries, or let's check for raspberries. Unfortunately one does have to keep an eye on her as she will pick raspberries which are nowhere near ripe enough when she can no longer find ripe ones. She also has a tendency to scarf them quickly, so you do need to be quick to get some yourself.
Raspberries are a must have in the garden if you have some extra space and a sunny location. They are easy to grow and produce lots of delicious fruit, more over they do not have many pest (even the dreaded QLD fruit fly has left them alone thus far). However the do run excessively, so containing them or putting when were they can be mowed over is a must. Just remember to cut the canes back which have finished producing fruit and you will have a healthy and productive raspberry patch for years to come. And you can always offer some of the raspberry runners to friends who are certain to appreciate them.
UPDATE
I took a couple of additional photos which I thought I would include in this entry. These show a couple of different multiple raspberry clusters with different stages of fruit development.


Saturday, 31 October 2009
Garlic Harvest
 After being in the ground for over six months, it was finally time to harvest my garlic. I planted over 150 Italian White garlic cloves back around the end of March. It was a soggy start for them due to the unseasonable heavy rains we experienced through autumn. Besides the saturated soil causing some of the cloves to rot, there was the huge number of weeds which vied for supremacy. All the while I had to remind the weedy brethren who owned this particular patch.
 Of course, towards the end of the growing period, our rain situation was quite the opposite. The soil around the garlic became like powder at times, so plenty of water was required to keep them going. While dry conditions are great as the garlic comes to the end of its season, it is not so good when the season has not quite completed yet.
Growing garlic in the sub-tropics is significantly different from what I had been used to in Canada. In the old country, I would plant out the cloves at the end of autumn, just before the ground would freeze over. The cloves would lie dormant until spring, when, as soon as the ground warmed, they would be up like a crocus, even when there was still snow on the ground.
In the sub-tropics you plant garlic around March to early April after the intense heat of summer has faded a bit. Then you wait until around September to October to harvest them while they are still very much green and alive; as opposed to dying back like in Canada. The conditions in the sub-tropics at this time of year are ideal for the harvesting of garlic, as they should be allowed to dry out before harvest.
 So how did the harvest turn out? Very well I thought. Even the tiniest cloves were able to produce a garlic bulb, albeit on the small size. Even with the heavy rains, I only lost a handful of garlic. While not all of the garlic are large, many are quite sizable. It will be from these biggies that I consider for my breeding stock come next year. Improvements in my planting next year will be a higher garden bed, thus having better drainage. As well, I will provide a bit more space between each plant.
In the meantime the garlic is now drying inside as we have been getting rain again. In a couple more weeks there will be even more reasons to have garlic in the dish; because there is *nothing* like organic fungicide-free garlic!
Thursday, 22 October 2009
Mi cassava, es su cassava
Here at Maculata Grove it is as though mother nature has put a roof over the place, very little rain to speak of. This is typical for this time of year in the sub-tropics and tropics. The so called build up to the rainy season is the driest time of the year. The cracks in the earth are getting large enough to swallow up small children, speaking of which...
 Some of our trees are really suffering, in particular some of the lillypillies. Other trees, such as the Illawarra Flame tree, which are used to this dry time of year, have shed all their leaves going into a temporary dormancy. However if you choose your plants correctly, there should be no reason for a sustainable harvest not to be in reach. While I will not be eating cassava root any time soon, the cassava cuttings I stuck in the ground before winter are doing very well. Especially considering they have received no attention or water since planting. Yet there they are with green shoots getting ready to power through the wet season.
It is plants such as cassava and sweet potato, which have adapted to a tropical environment, which gardeners in these regions really need to be embracing. They are certainly welcome in my/your house any time.
 Some of our trees are really suffering, in particular some of the lillypillies. Other trees, such as the Illawarra Flame tree, which are used to this dry time of year, have shed all their leaves going into a temporary dormancy. However if you choose your plants correctly, there should be no reason for a sustainable harvest not to be in reach. While I will not be eating cassava root any time soon, the cassava cuttings I stuck in the ground before winter are doing very well. Especially considering they have received no attention or water since planting. Yet there they are with green shoots getting ready to power through the wet season.
It is plants such as cassava and sweet potato, which have adapted to a tropical environment, which gardeners in these regions really need to be embracing. They are certainly welcome in my/your house any time.
Wednesday, 21 October 2009
Swaleville

 Welcome to swaleville, population one. Well you have got to start some where. I do have plans to continue the swale breeding program. My swale making studs, pick and shovel, are always eager to dig in. :)
If you are not up on your Permaculture jargon, you might be asking yourself - what is a swale?
A swale is a fancy word for water holding ditch. Its purpose is to capture water during high mounts of rain or run-off and temporarily store it. This allows the water to slowly seep into the sub-soil where plants with deep roots can take advantage of it. As well, if swales are built at the top of a hill, this can help deliver ground water to areas near the bottom of the hill. Whether this works will depend on your soil profile.
Swales also have the added bonus of capturing organic material, which quickly breaks down when the swales are damp or wet. This in turn provides nutrients to plants.
Swales are built along contour lines, or as close as possible to. This allows the full height of the swale to be filled with water along its entire length. In my case, the swale was purposely built just off the contour line. However I did mound the soil more on the northern end so that, as the soil settles and becomes more of a barrier, it will fill up evenly across its length.
My swale starts to the south near our grass driveway and continues towards the rose garden. It has been designed so that the overflow will go towards the rose garden and then down to some future swales. This should help reduce the amount of water flow down the driveway during high rainfall events.
 The swale has been planted with two small leafed Jaboticabas and one Ceylon Hill Cherry (aka Hill Goosebrry, aka Downy Myrtle, aka Rose Myrtle, etc - latin name Rhodomyrtus tometosa). I will also put in some Rosellas to fill in the gaps for the next few seasons. I still need to finalise what I will do at the southern end of the swale. My current plan is to plant another Ceylon Hill Cherry as well as a native lillypilly. With the exception of the temporary plantings, this will mean that all the plants are from the Myrtaceae family. Moreover, they are all extremely attractive food producing plants.
Anyway I have heaps of other things to plant in the area so that my food forest can start taking shape, so I had better get busy ensuring another round of courtship proceeds smoothly (or on the level).
Tuesday, 6 October 2009
Pumped

I have been fairly excited in recent days. I feel liberated from one of the great worries of farmers. And that worry is, when will it rain? While there is no replacing natural rain, having a water source which can be used for irrigation is absolutely fantastic.
The primary purpose of the new pond was for irrigation of the property. We are extremely fortunate that this is a spring-fed pond. So it just keeps filling and overflowing.
I was also very fortunate that the previous owners happened to put the waste treatment plant a short distance away from where I wanted to locate the pump. To me, electric was the only choice to power the pump. While solar might have been a distant second option as well, it is simply more efficient to put larger scale solar panels on the roof, than it is to have a small solar panel only driving a pump. So I have been able to run a temporary extension cord from the power point at the waste treatment plant to the pump.
After extensive research and comparison of Davey, Onga, and Grundfos pumps, I decided that the Grundfos JPB 4 PC15 was the best option. I was only looking for about 30 L/min and it can deliver up to 60 L/min. Moreover it takes much less power to do so than its Australian counter parts. Not to mention it was significantly cheaper even with a recent price rise. So while I would have like to support the Australian pump manufacturers, the simple fact was their engineering did not match my requirements without additional cost and, most importantly, additional power consumption. Power was my foremost consideration due to the existing power requirements of the waste treatment system.
For the piping, I chose 1-1/4 inch rural piping. This is also known as green line. It is an economical pipe with reasonably priced fittings. While it obviously has greater resistance than 1-1/2 inch and 2 inch pipe, the pump is able to still provide the required flow rate through this diameter of pipe. The longest run will be about 100+ meters with about an 8-meter delivery line static head and a 2-meter supply line static head. We have not fixed the pipe in place at this stage, as I wanted to see how well it worked at various locations on the property. So there is still some work to be done for the final fixed set up.
 In the meantime, I have been able to lug the pipe around and get water back into the subsoil. How to I know that? Well, I put in 5 Jakfruit Blackgold seedlings into the chook free range area. I intensively watered the ground before I planted and the soil sucked it all up, including the clay subsoil (the green in the grass is thanks to the irrigation). However I did find that for the final planting hole, I had not watered the ground sufficiently. The soil which a shovel was able to shift in the other holes, required a mattock. Even then it was hard going. When I reached the clay layer, I had to stop. I filled the hole with water and let it soak in over night. The next day I was able to resume the planting which included working gypsum and organic matter into the clay layer.
 So I look forward to being able to continue with an aggressive planting schedule as are in the driest time of the year for the SEQ area. Next stop, swale-ville.
Oh yes, I should also mention that the pump enclosure was made almost entirely out of recycled materials, with the exception of the roofing screws.
Sunday, 4 October 2009
BOGI Fair and Competition
 Today was the grand 2009 BOGI fair. It is a great event which has many varied stalls with a strong sustainability theme, most with a gardening or food focus. There were solar cooking demonstrations, worm farm making demonstrations, Mark Tully and his rare breeds, seeds, plants, food, and the competition.
 This was the first year I entered the competition. In fact, this was the first time I have ever entered a gardening competition. The cost was $2 for up to 6 entries and I entered five items: silverbeet, potatoes, snow peas, onions, and tomatoes. I did have other produce as well, but I did not feel that it was quite up to competition standards. When the judging was complete, I was able to secure second prize for the desiree potatoes, and first prize for the snow peas and onion. I must admit that for the onion category, that there was only my entry. However I do feel that even with multiple entries I still would have achieved the top prize as my onion was a whopper.
Of particular interest, the BOGI competition focuses on the taste and brix reading of the produce. So the look of the entry has nothing to do with one's ability to win a prize. And really this is what food should be about, the taste and nutritional density of the food, not how it looks or whether it is a standard size. Variability in one's produce is normal for an organic gardener, and there is nothing like variety to add that extra flavour to a meal.
Wednesday, 23 September 2009
A Hazy Shade of Sepia
The weather forecast for today was dry and windy with a haze developing. Well the dust from central Australia certainly did envelope, most of the Australian east coast for that matter. We lost site of Clear Mountain (how ironic) and Mount Samson, as the first two pictures show. The landscape was visually surreal, as the colour was stripped from the background but present in the foreground. It was almost as if some Photoshop whiz was exercising their artistic flair on a grand scale.


The wind and heat over the weeks has been sucking the soil dry. This has required more water from our household water tanks to keep the main food gardens alive. We still have a good supply of water for the house, probably around 19000 L. This is mainly due to sound water conservation practices which attempts to utilise our water multiple times. For instance, we bucket the water from our daughter's bath into the cistern of the toilet. And after we flush, the underground treated effluent irrigation from the waste treatment plant waters our citrus grove.
Tomorrow I hope to get a new pump up and running, so with that in operation we will be able to start irrigating more of the food gardens using the water from the pond. This will hopefully keep plants such as the asparagus and passionfruit quite contented until the rainy season.


The wind and heat over the weeks has been sucking the soil dry. This has required more water from our household water tanks to keep the main food gardens alive. We still have a good supply of water for the house, probably around 19000 L. This is mainly due to sound water conservation practices which attempts to utilise our water multiple times. For instance, we bucket the water from our daughter's bath into the cistern of the toilet. And after we flush, the underground treated effluent irrigation from the waste treatment plant waters our citrus grove.
Tomorrow I hope to get a new pump up and running, so with that in operation we will be able to start irrigating more of the food gardens using the water from the pond. This will hopefully keep plants such as the asparagus and passionfruit quite contented until the rainy season.
Wednesday, 16 September 2009
Pondorama

On the south-eastern edge of the pond you can see the concrete 375 mm pipe which allows the water to flow into the pond. This provides a constant pleasant waterfall from the stream coming into the pond. Over time, the lomandra hystrix planted around the piping should cover up the look of the urban pipe-work.
On the final day of earthworks, I also had a new plant shelf on the north-eastern side of the pond put in. This has increased the surface area of the water considerably, and provided a large shelf on which water filter plants like grey rush will be planted.
The final dimensions of the pond are about 40 m long south-to-north and about 15 m wide east-to-west (at its widest point).
You might have noted the use of the word pond instead of dam to describe this new waterway. As there is no real dam wall, it really is more appropriate to call it a pond.
Occupation chook
 As I have mentioned in recent posts, the chook house is now being occupied. We put the chooks in their new home over a week ago and kept them inside the coop entirely for the first few days. As we did not have the chook run constructed at this time, we figured that this would be for the best plus they could get used to this being their new home. It was lots of "fun" capturing the chooks to put them in. Particularly Rusty, as he does not like being caught and is very good at evading capture these days (fox attacks probably have this kind of impact on chooks).
We changed the colour of the paint on the outside of the nest boxes. Although I preferred the original colour, it absorbed too much heat. The new sandy desert colour is significantly cooler. Since we want the chooks to lay as opposed to bake, I figured that colour co-ordination was much less important. In case anyone is wondering why we even considered the darker colour in the first place, it was mistinted paint at half price. We thought it might be too dark and it was. Thankfully the new colour was free, compliments of Mr HHH.


The person door (820 mm wide) was acquired from our local transfer station. As the chook door frame width is only 600 mm, the door had to be cut down to size along the bottom and on one side. It is a hollow door, so I used a very old can of expanding foam to fill in the two cut sides. So while it looks like there should be more door, it works just fine.
The two chook doors were constructed in a similar fashion to the nest box lids, with fibre cement on the outside and ply on the inside. The doors have gate latches on them so that they lock securely when closed. Actually the nice thing about them is that they are large enough for even me to fit through. This has already been handy when we put up a temporary divider within the coop as I did not want the chickens to "own the place". I was stuck on the other side of the divider and exited through the chook door (ever so gracefully of course).
We also made a perch and a perch-type access to their nest boxes. The two perches were made from a feral Jacaranda tree; while it is not as good as a camphor laurel timber, one less feral tree is still a good thing. Now the sad thing is that they are not using their nest boxes, nor their perch. They are big birds and I guess it does take them time to adjust to new things, but they could appreciate the handy work a bit more now couldn't they?! We got three eggs on the second day, so even though they are laying on the floor, this has not impacted their output. Thanks girls.
The remaining coop to-do items are weather strips over the two chook doors, installation of the guttering and down piping, attaching siding along the western roof edge for greater stormy weather protection, and a permanent divider between the two parts of the chook shed.
It is worth noting that in the construction of the chook shed, a significant portion of the materials were recycled. Some of the recycled material used was the roofing iron, roofing channels, ply wood, doors, sisalation, metal strapping, guttering, 6 mm fibre cement, nails, wood piers, tension rod, and some of the roofing screws. The new materials used were screws, hinges, door latch, cement, compressed fibre sheeting for the floor, most of the framing wood, some of the paint, and silicone sealant. So I am pleased that this project has helped to reduce some of the waste which could have ended up in landfill.
By the way, if anyone has any suggestions on a name for the chook coop, please post it in the comments.

Sunday, 6 September 2009
Hitting Bottom
 I took the kayak out on the dam to test out the water depth. Sadly, it is the first time this kayak has touched Australian waters. Given the length of time I have been living in this great country, it has been far too long. However it was still up to the task and, despite there not being much in the way of white water, it performed quite well.
During the portage from the shed to the dam, I thought about a great Canadian super hero called Mr Canoehead (Canada's greatest aluminum crime fighter). If you have never heard of this mighty Canuk, then it is worth checking out the link to some old video clips.
 After launching into the dam, I could not resist "opening her up" (i.e. paddling quickly from one end to the other). It is always relaxing paddling and I look forward to doing this regularly in the future.
 After a bit of fun, I used a depth checker to see where the bottom was. Unfortunately, the depth is not quite as deep as I would have liked. It is only about 1.5 m at either end, with the northern end being just slightly deeper. Throughout the rest of the deeper parts of the dam it varies from about 1 m to 1.25 m. So I would say that the average depth of the water is around 1.2 m. Still, given the challenges with all the water while it was being dug out, it is still a good result. But I will see if we can excavate a bit more tomorrow.
I also took the opportunity to plant some of the reeds back around the shallower areas. Hopefully they will take and start filtering the water. I will also need to speak with the folks at the Kumbartcho Sanctuary nursery and purchase some native water and margin plants to put around the dam.
No thanks, I'm full
 The water level in the new dam has been rising at an impressive rate. So much water has been pouring in, that the dam is already filled to capacity. Pretty much all of the shallow areas on the western side have been covered with water. This has occurred less than 48 hours after the temporary earthen bung wall was removed. Part of the reason for the rapid filling is that there is no dam wall at the end of the dam. Thus the lowest part of the dam is the highest level of the water. But it is still impressive considering that there has been very little rain in over two months.
The first picture is of the water level before the water behind the bung wall was released shortly after 3 PM on Friday afternoon. The second picture is less than a minute after the water was released. You can see the water rushing into the dam on the right hand side of the photo. The third picture is the following morning (Saturday). The fourth picture is from Sunday morning (the day this blog entry was published).


The pictures above are taken from the southern end looking north. Below are some additional pictures from around the dam. The first picture is a view of the water entering the dam from the south-eastern end with the the western side in the background. The second picture is from the northern end looking south. The final picture is again from the northern end, this time looking south-west (with the shed in the background).


The height of the dam edges are quite appropriate, I believe, as they will allow for an increased capacity during heavy rains without the banks being compromised. We'll see if Mrs Nature has anything to add about this thought.
Subscribe to:
Posts (Atom)